こんにちは、バックエンドエンジニアのまさです。
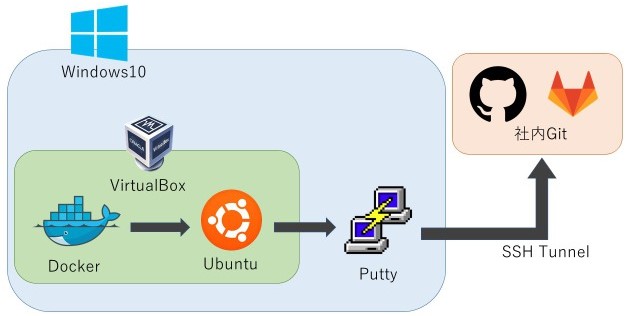
前回はdockerを使ってクライアント認証を回避するProxyを構築する手法を紹介させていただきましたが、今回もdockerを活用し、お手軽にGCPの環境(正確にはfirebaseの環境)をエミュレートする手法を紹介したいと思います。
クラウドサービスの選定時の動作検証に利用したり、既にGCPを活用されている場合にも、ローカルで検証することで品質の向上やテストの質を向上させることが容易くなると思います。
なおこの手法のエミュレータでサポートされるプロダクトの範囲は
- firebase Authentication(Identity Platform)
- Cloud Firestore
- firebase Realtime Database
- Cloud Functions
- firebase Storage
- firebase Hosting
- firebase PubSubトリガー
- Firebase Extension
- Cloud Datastore
ですが、その内今回ご紹介するのは
- firebase Authentication(Identity Platform)
- Cloud Functions
- Cloud Datastore
になります。
事前準備
- GCPプロジェクトの作成 (セットアップ時に作成することも可能です。)
- GCPプロジェクトに紐づくGoogleアカウント
環境構築
firebaseの設定ファイルの作成
まずはfirebaseエミュレータの動作を定義するファイルfirebase.jsonを作成します。
定義するのは
- auth:Authenticationエミュレータの起動ポートとバインドアドレスの定義
- functions:Functionsエミュレータの起動ポートとバインドアドレスの定義
- ui:エミュレータの管理画面の起動ポートとバインドアドレスの定義
- clundFunctionsのデプロイ定義
となります。
他のエミュレータも利用する場合は適宜定義を行ってください。
firebase.json
{
  "emulators": {
    "auth": {
      "port": 9099,
      "host": "0.0.0.0"
    },
    "functions": {
      "port": 5001,
      "host": "0.0.0.0"
    },
    "ui": {
      "port": 4000,
      "enabled": true,
      "host": "0.0.0.0"
    }
  },
  "functions": {
    "predeploy": [
      "npm --prefix \"$RESOURCE_DIR\" run lint",
      "npm --prefix \"$RESOURCE_DIR\" run build"
    ],
    "source": "functions"
  }
}
Dockerfileの作成
まずはemulatorをdocker上で起動させるため、Dockefileを作成します。
Dockerfile
FROM google/cloud-sdk:alpine

WORKDIR /emulator

RUN apk add --update --no-cache openjdk11-jre bash curl nodejs npm &&\
    gcloud components install cloud-datastore-emulator beta --quiet

RUN touch ~/.bashrc \
    && curl -o- -L https://yarnpkg.com/install.sh | bash \
    && ln -s "$HOME/.yarn/bin/yarn" /usr/local/bin/yarn

RUN yarn global add google-cloud-gui && \
    npm install -g firebase-tools

COPY ./firebase.json ./
emulatorの初期セットアップ
以下のコマンドで、一旦上記の状態でビルドを行います。
docker build -t ${TAG名} .以下のコマンドでコンテナを起動し操作を行います。
docker run --rm -it -v `pwd`:/tmp/shared ${TAG名}コンテナ上でfirebaseの初期セットアップを進める必要があるため、まずはGoogleアカウントの認証を行います。
firebase login --no-localhost

i  Firebase optionally collects CLI usage and error reporting information to help improve our products. Data is collected in accordance with Google's privacy policy (https://policies.google.com/privacy) and is not used to identify you.

? Allow Firebase to collect CLI usage and error reporting information? (Y/n)
#(firebaseのデータ収集に協力するかどうかの質問です、Y/Nで任意の回答で問題ありません。)

To sign in to the Firebase CLI:

1. Take note of your session ID:

   XXXXX
#(後ほどブラウザで認証を行う際の確認用のセッションIDです。)

2. Visit the URL below on any device and follow the instructions to get your code:

   https://auth.firebase.tools/login?code_challenge=xxxxx
#(上記のURLをブラウザにペーストして認証を進めて表示されるauthorization codeをコピーし下記にペーストします。)

3. Paste or enter the authorization code below once you have it:

#(authorization code貼り付け後、以下のような出力があれば成功です。)
✔  Success! Logged in as xxxxxx@gmail.com  # <- 認証したメールアドレス
アカウントの認証後は下記のようにしてfirebase emulatorのセットアップを進めます。
firebase init

? Which Firebase features do you want to set up for this directory? Press Space to select features, then Enter to confirm your choices. (Press <space> to select, <a> to toggle all, <i> to invert selection, and <enter> to proceed)
#(セットアップするfirebaseのプロダクトを選択します。今回はEmulatorsのみSpaceで選択しEnterします。)

 ◯ Realtime Database: Configure a security rules file for Realtime Database and (optionally) provision default instance
 ◯ Firestore: Configure security rules and indexes files for Firestore
 ◯ Functions: Configure a Cloud Functions directory and its files
❯◯ Hosting: Configure files for Firebase Hosting and (optionally) set up GitHub Action deploys
 ◯ Hosting: Set up GitHub Action deploys
 ◯ Storage: Configure a security rules file for Cloud Storage
 ◯ Emulators: Set up local emulators for Firebase products
(Move up and down to reveal more choices)

=== Project Setup

First, let's associate this project directory with a Firebase project.
You can create multiple project aliases by running firebase use --add,
but for now we'll just set up a default project.

? Please select an option: (Use arrow keys)
#(紐づけるGCPプロジェクトを選択します。既存のプロジェクトを選択したり、新たにプロジェクトを作成することも可能です。)
❯ Use an existing project
  Create a new project
  Add Firebase to an existing Google Cloud Platform project
  Don't set up a default project

#(Use an existing projectを選択した場合、下記のようにアカウントに紐づいているプロジェクト一覧が表示され、その中から選択することが可能です。)
? Select a default Firebase project for this directory: (Use arrow keys)

=== Emulators Setup
? Which Firebase emulators do you want to set up? Press Space to select emulators, then Enter to confirm your choices. (Press <space> to select, <a> to toggle all, <i> to invert selection, and <enter> to proceed)
#(どのプロダクトのEmulatorを利用するか選択します。firebase.jsonの設定に基づいて選択済み状態となっていますので、他に必要なものがなければそのままEnterで問題ありません。)
❯◉ Authentication Emulator
 ◉ Functions Emulator
 ◯ Firestore Emulator
 ◯ Database Emulator
 ◯ Hosting Emulator
 ◯ Pub/Sub Emulator
 ◯ Storage Emulator

#(指定されたプロダクトのエミュレータの動作ポートが確認で表示されます。)
i  Port for auth already configured: 9099
i  Port for functions already configured: 5001
i  Emulator UI already enabled with port: 4000
? Would you like to download the emulators now? No
#(Emulatorを今すぐダウンロードするかという質問ですがコンテナは一度終了させるためNoと回答します。)ここまで設定を行うと~/.config/配下に設定ファイルが作成されますので、これをホストのディレクトリにコピーします。
cp -rap ~/.config /tmp/shared/コンテナでの設定はひとまず完了ですので、コンテナからログアウトします。
動作検証用のアプリケーション作成
エミュレータの検証用の処理としてDatastoreに1レコード追加するだけの関数とAuthentication上にユーザーを追加するだけの関数の2つの関数をCloudFunctions用に作成します。
./functions/src/index.ts
import {initializeApp} from 'firebase-admin/app';
import * as functions from 'firebase-functions';
import {Datastore} from '@google-cloud/datastore';
import {getAuth} from 'firebase-admin/auth';

initializeApp();

exports.test1 = functions.https.onRequest(async (req, res) => {
  const datastoreKind = 'Sample';
  const datastore = new Datastore();
  const id = 'example1';
  const data = {rec1: 'a', rec2: 2};
  const key = datastore.key([datastoreKind, id]);
  try {
    await datastore.save({key, data});
    res.status(200).send('ok');
  } catch(error) {
    res.status(500).send('error');
  }
  return;
});

exports.test2 = functions.https.onRequest(async (req, res) => {
  const auth = getAuth();
  try {
    const rec = await auth.createUser({
        email: 'user@example.com',
        emailVerified: false,
        phoneNumber: '+11234567890',
        password: 'secretPassword',
        displayName: 'John Doe',
        photoURL: 'http://www.example.com/12345678/photo.png',
        disabled: false,
    });
    res.status(200).send('ok');
  } catch(error) {
    res.status(500).send('error');
  }
  return;
});
./functions/package.json
{
  "name": "functions",
  "scripts": {
    "lint": "eslint --ext .js,.ts .",
    "build": "tsc",
    "build:watch": "tsc --watch",
    "serve": "npm run build && firebase emulators:start --only functions",
    "shell": "npm run build && firebase functions:shell",
    "start": "npm run shell",
    "deploy": "firebase deploy --only",
    "logs": "firebase functions:log"
  },
  "engines": {
    "node": "16"
  },
  "main": "lib/index.js",
  "dependencies": {
    "@google-cloud/datastore": "^6.6.2",
    "firebase-admin": "^10.0.2",
    "firebase-functions": "^3.18.0"
  },
  "devDependencies": {
    "@typescript-eslint/eslint-plugin": "^5.12.0",
    "@typescript-eslint/parser": "^5.12.0",
    "eslint": "^8.9.0",
    "eslint-config-google": "^0.14.0",
    "eslint-plugin-import": "^2.25.4",
    "ts-node": "^10.8.0",
    "typescript": "^4.5.4"
  },
  "private": true
}
Dockerの起動設定
次に設定ファイルを参照してEmulatorを起動できるようにスクリプトを作成します。この際にcloudFunctionsのエミュレータで先ほど作成した処理を、起動時にコンパイルしてデプロイさせるようにします。
entrypoint.sh
#!/usr/bin/env bash

# プロジェクトの設定
gcloud config set project ${GCP_PROJECT_ID}

# Datastoreの管理UIの起動
google-cloud-gui --port=${DATASTORE_UI_PORT} --skip-browser &

# Datastore Emulatorの起動
gcloud beta emulators datastore start --store-on-disk \
  --host-port=${DATASTORE_HOST_PORT} \
  --data-dir=${DATASTORE_DATA_DIR} &

# Datastoreの初期化待ち
sleep 5

# Emulator内部のアプリケーションのDatastore接続先をエミュレータに設定
$(gcloud beta emulators datastore env-init --data-dir=${DATASTORE_DATA_DIR})

# Cloud Functions用のソースのビルド
cd functions/
npm install
npx tsc --init
sed -e "/outDir/c \"outDir\":\"lib\"," ./tsconfig.json > ./__tsconfig.json
mv ./__tsconfig.json ./tsconfig.json
npm run build
cd ../

# Emulator Suiteの起動
firebase emulators:start上記のスクリプト内の$(gcloud beta emulators datastore env-init --data-dir=${DATASTORE_DATA_DIR})という部分でコンテナ内の環境変数にDatastoreへの接続をEmulatorに接続するように指示しています。これによってcloudFunctions内でのDatastoreへのアクセスがEmulatorに行われるようになります。
コンテナ起動時に設定ファイルのコピーとアプリケーションの配置及びスクリプトを起動させるようにDockerfileに追記を行います。
Dockerfile
FROM google/cloud-sdk:alpine

WORKDIR /emulator

RUN apk add --update --no-cache openjdk11-jre bash curl nodejs npm &&\
    gcloud components install cloud-datastore-emulator beta --quiet

RUN touch ~/.bashrc \
    && curl -o- -L https://yarnpkg.com/install.sh | bash \
    && ln -s "$HOME/.yarn/bin/yarn" /usr/local/bin/yarn

RUN yarn global add google-cloud-gui && \
    npm install -g firebase-tools

COPY ./firebase.json ./

# 設定ファイルのコピー
COPY ./.config/configstore /root/.config/configstore
# アプリケーションの配置
COPY ./functions ./functions
# スクリプトの設置
COPY ./entrypoint.sh ./
RUN chmod +rwx entrypoint.sh

# GCPのプロジェクトIDを設定
ENV GCP_PROJECT_ID=${GCP_PROJECT_ID}
# Datastoreエミュレーターのデータ保管先
ENV DATASTORE_DATA_DIR=/emulator/data
# Datastoreの待ち受けIF & ポート
ENV DATASTORE_HOST_PORT=0.0.0.0:8081
# Datastoreの管理用WebUI待ち受けポート
ENV DATASTORE_UI_PORT=8000

# スクリプトの起動
ENTRYPOINT ["./entrypoint.sh"]
ここまでの状態で再度コンテナのビルドを行います。
docker build -t ${TAG名} .これでemulator用のコンテナ環境の構築は完了です。
動作確認
emulator用コンテナの起動
あとはemulatorの公開ポートを指定して起動すれば、firebase authとcloud functionsのemulatorを利用することが可能になります。
docker run -d -p 9099:9099 -p 5001:5001 -p 4000:4000 -p 8081:8081 -p 8000:8000 --name emulators -it ${TAG名}起動したサーバーのエミュレータの管理画面のポートにブラウザで接続すると、下記のような画面が表示されます。
設定ファイルで有効にしたAuthentication emulatorとFunctions emulatorが起動している状態になっていることを確認します。
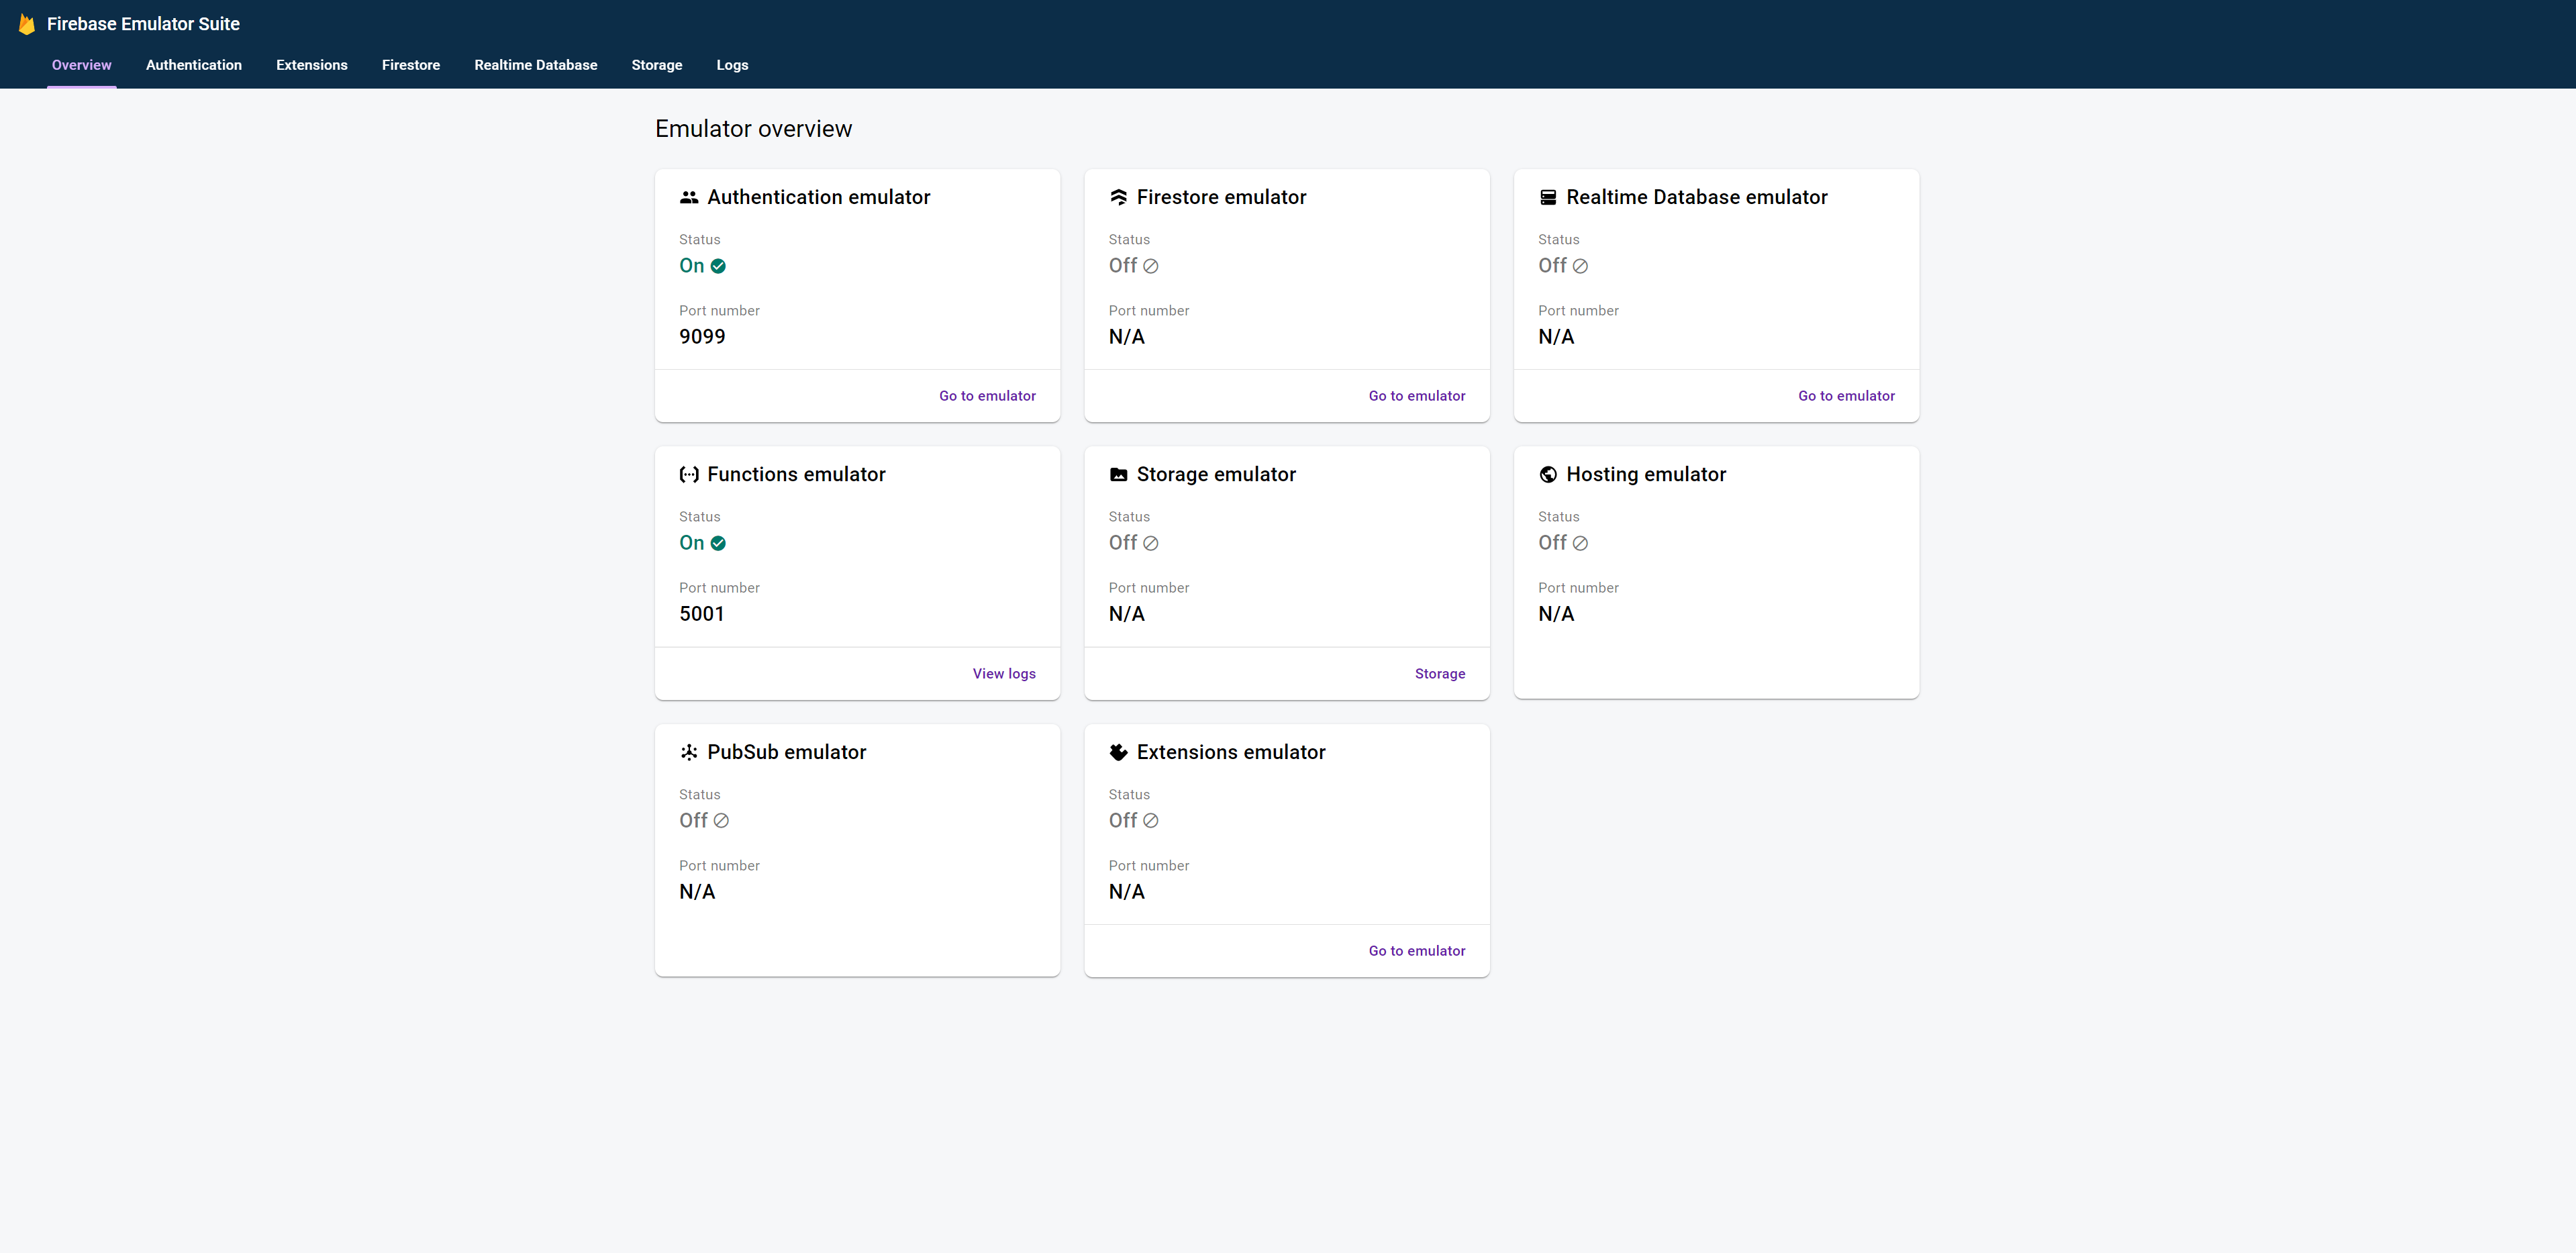
画面内のAuthentication emulatorのGo to emulatorをクリックしてみます。
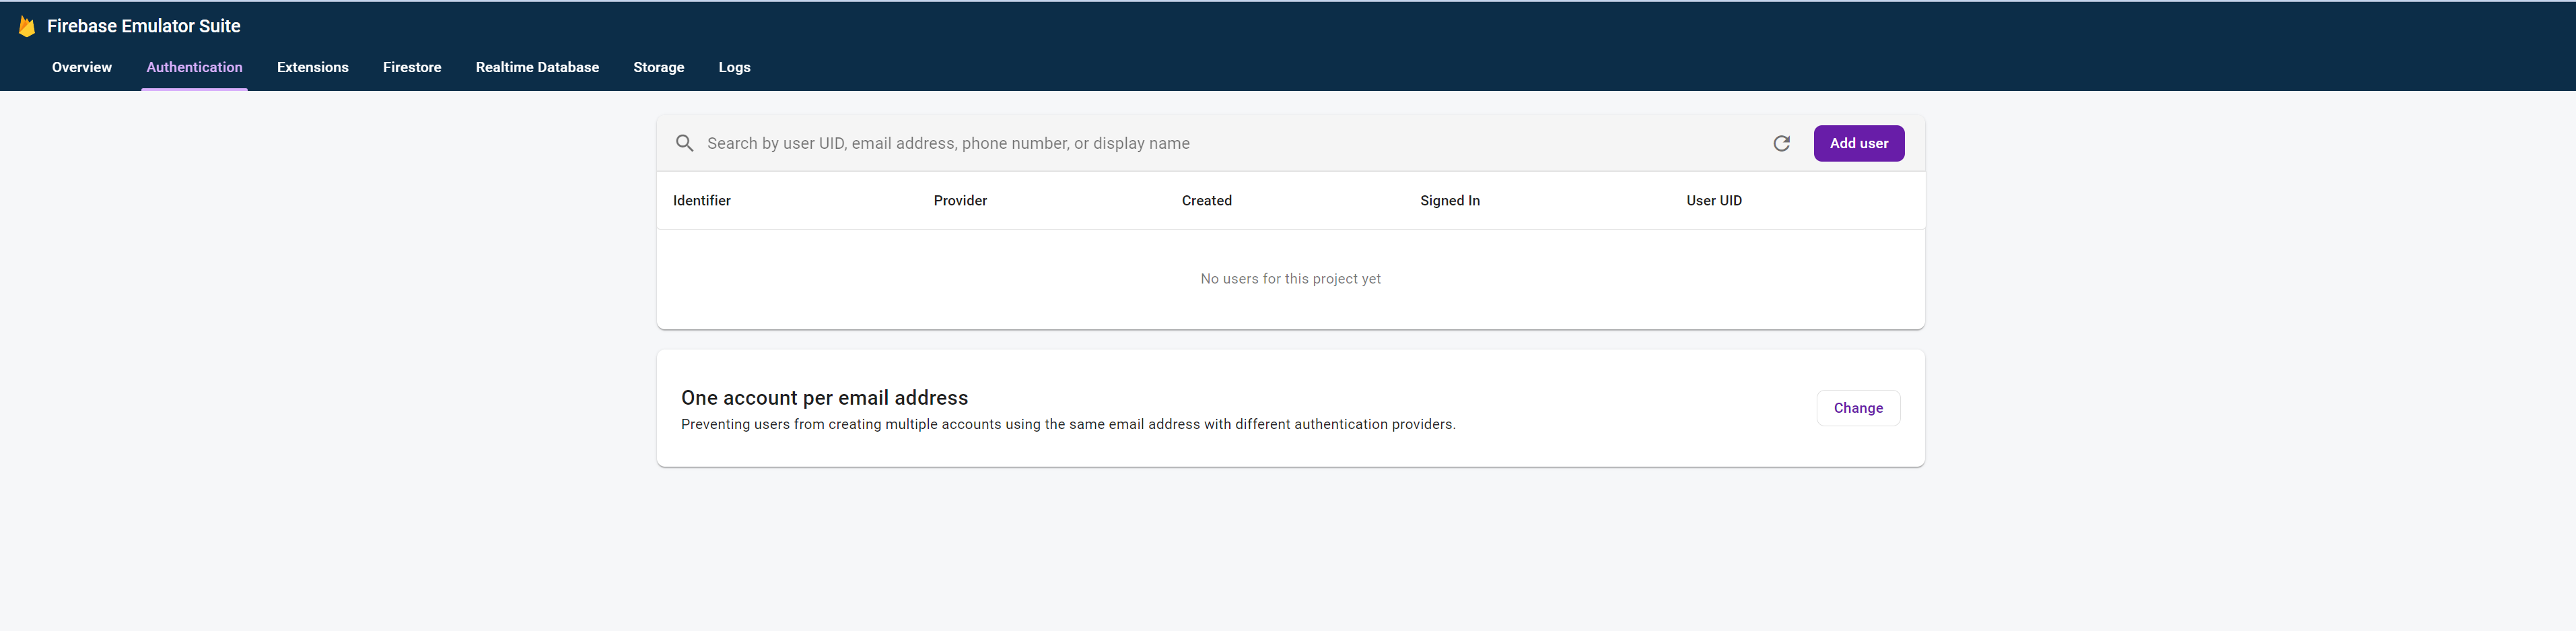
まだユーザーが登録されていないので、データは何も表示されていません。
CloudFunctionsに関してはログの閲覧のみ可能となっています。
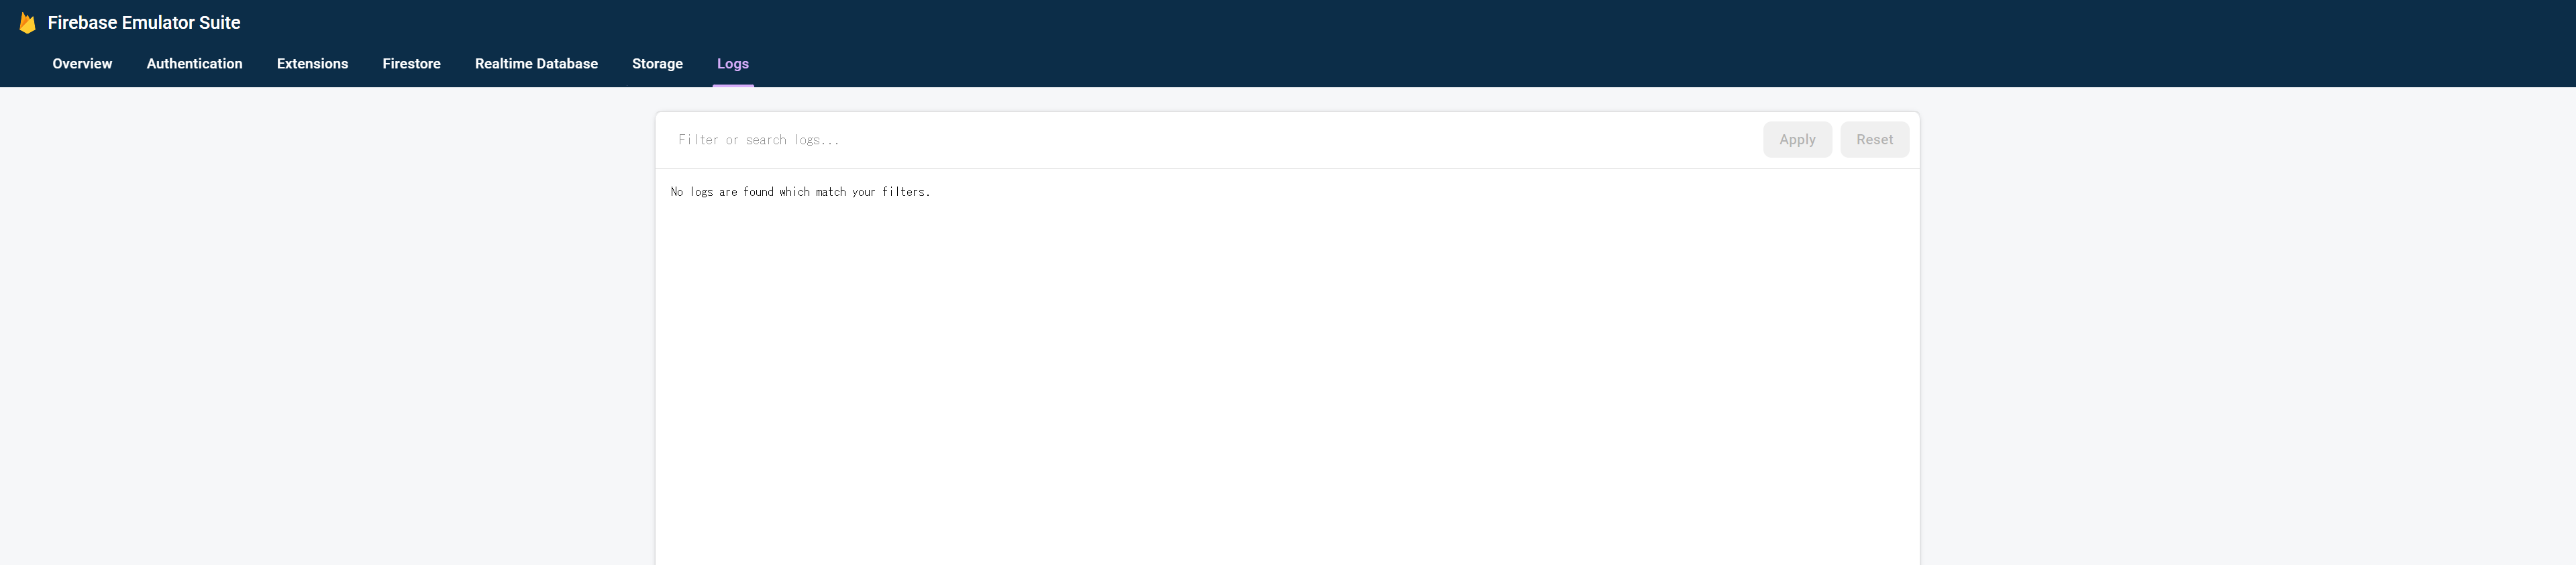
Datastoreに関しては管理画面が分かれています。先ほどのスクリプトで設定したDatastoreの管理用WebUI待ち受けポート(8000)にブラウザで接続してみます。
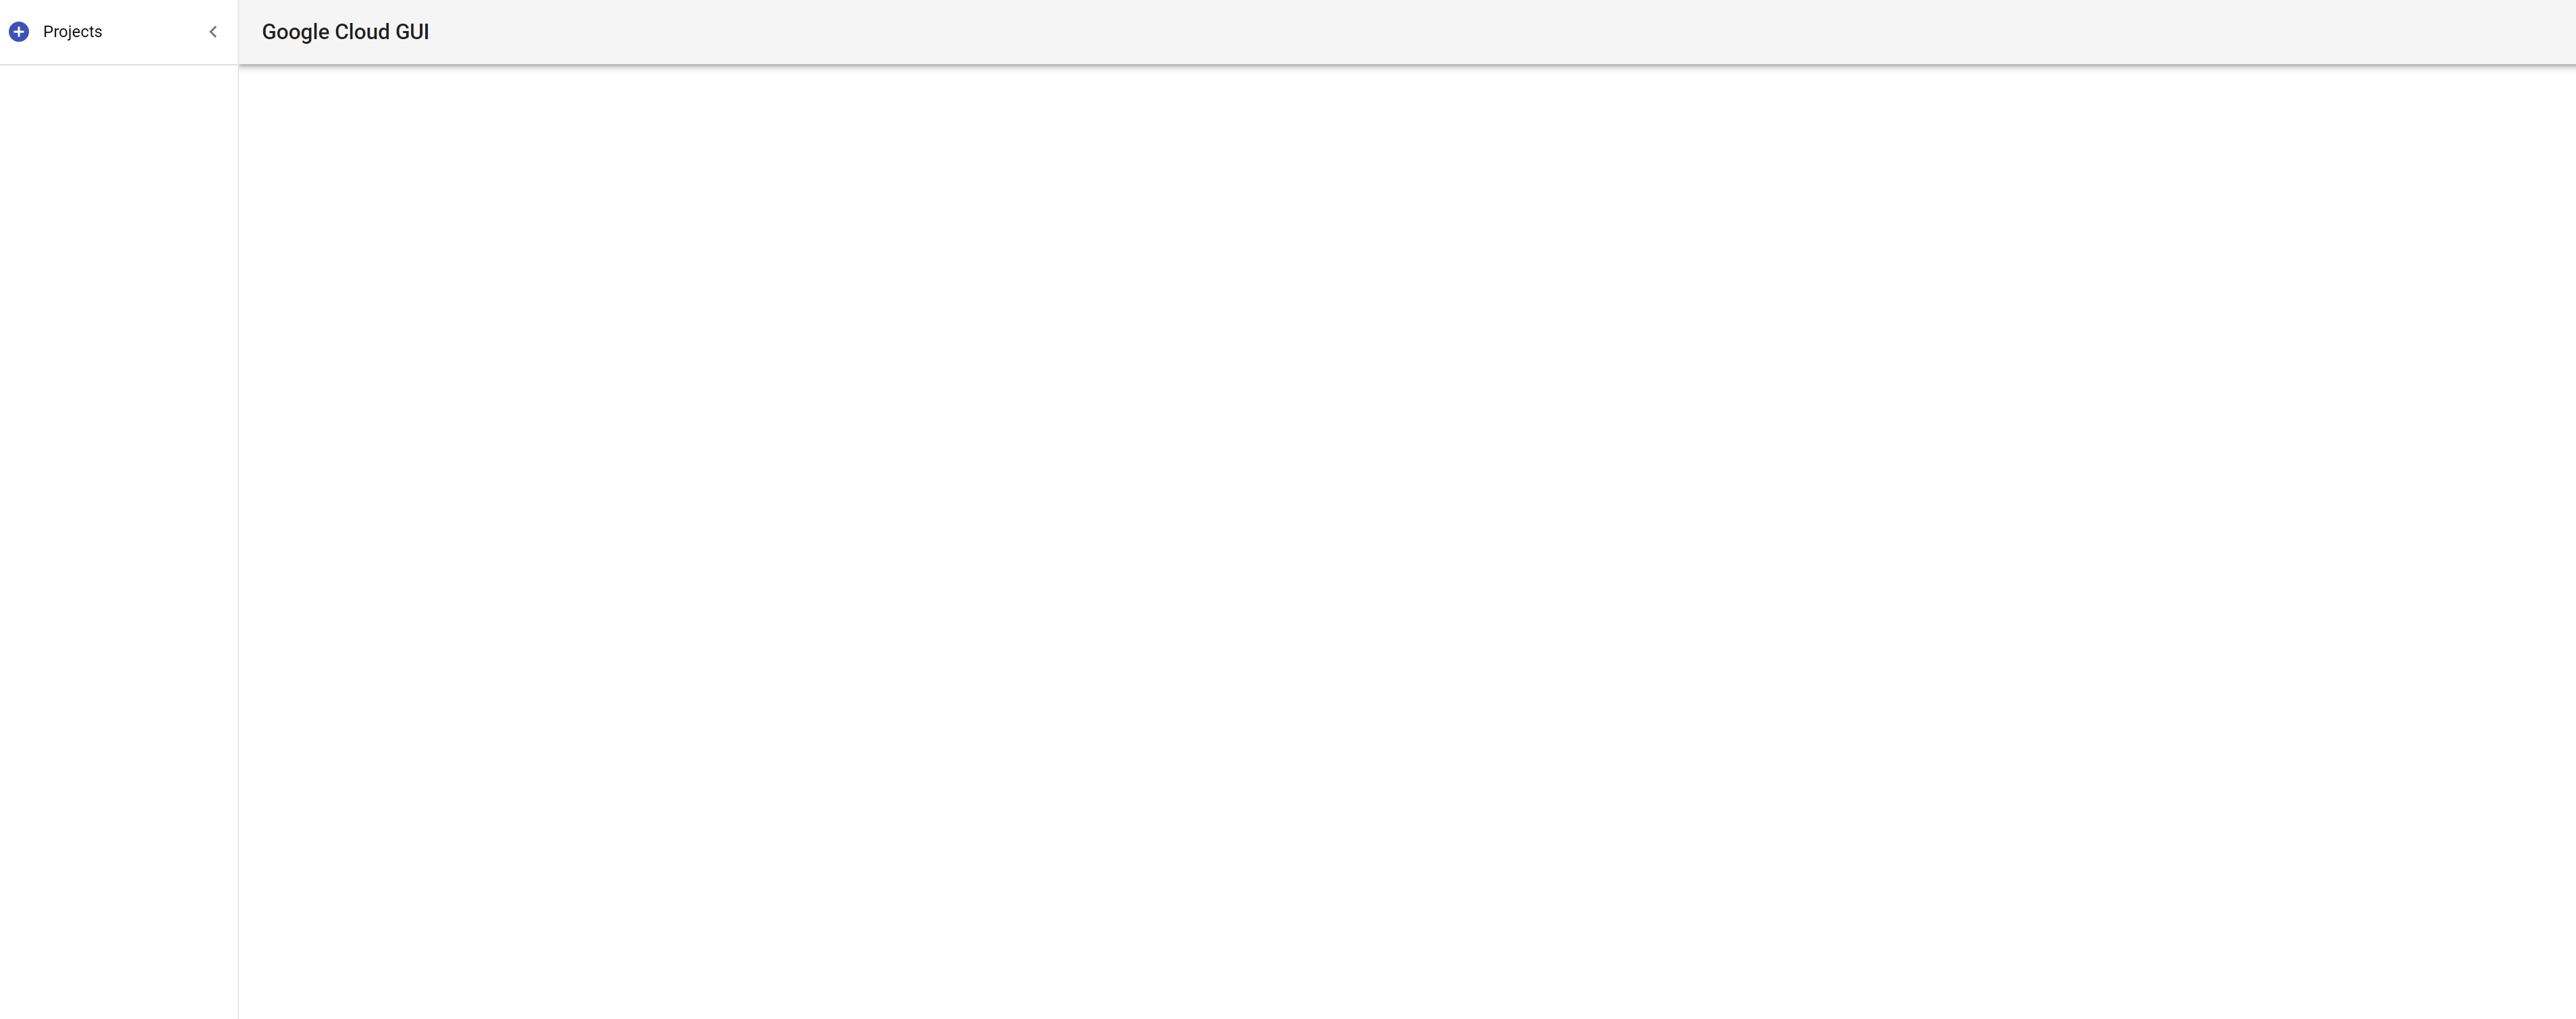
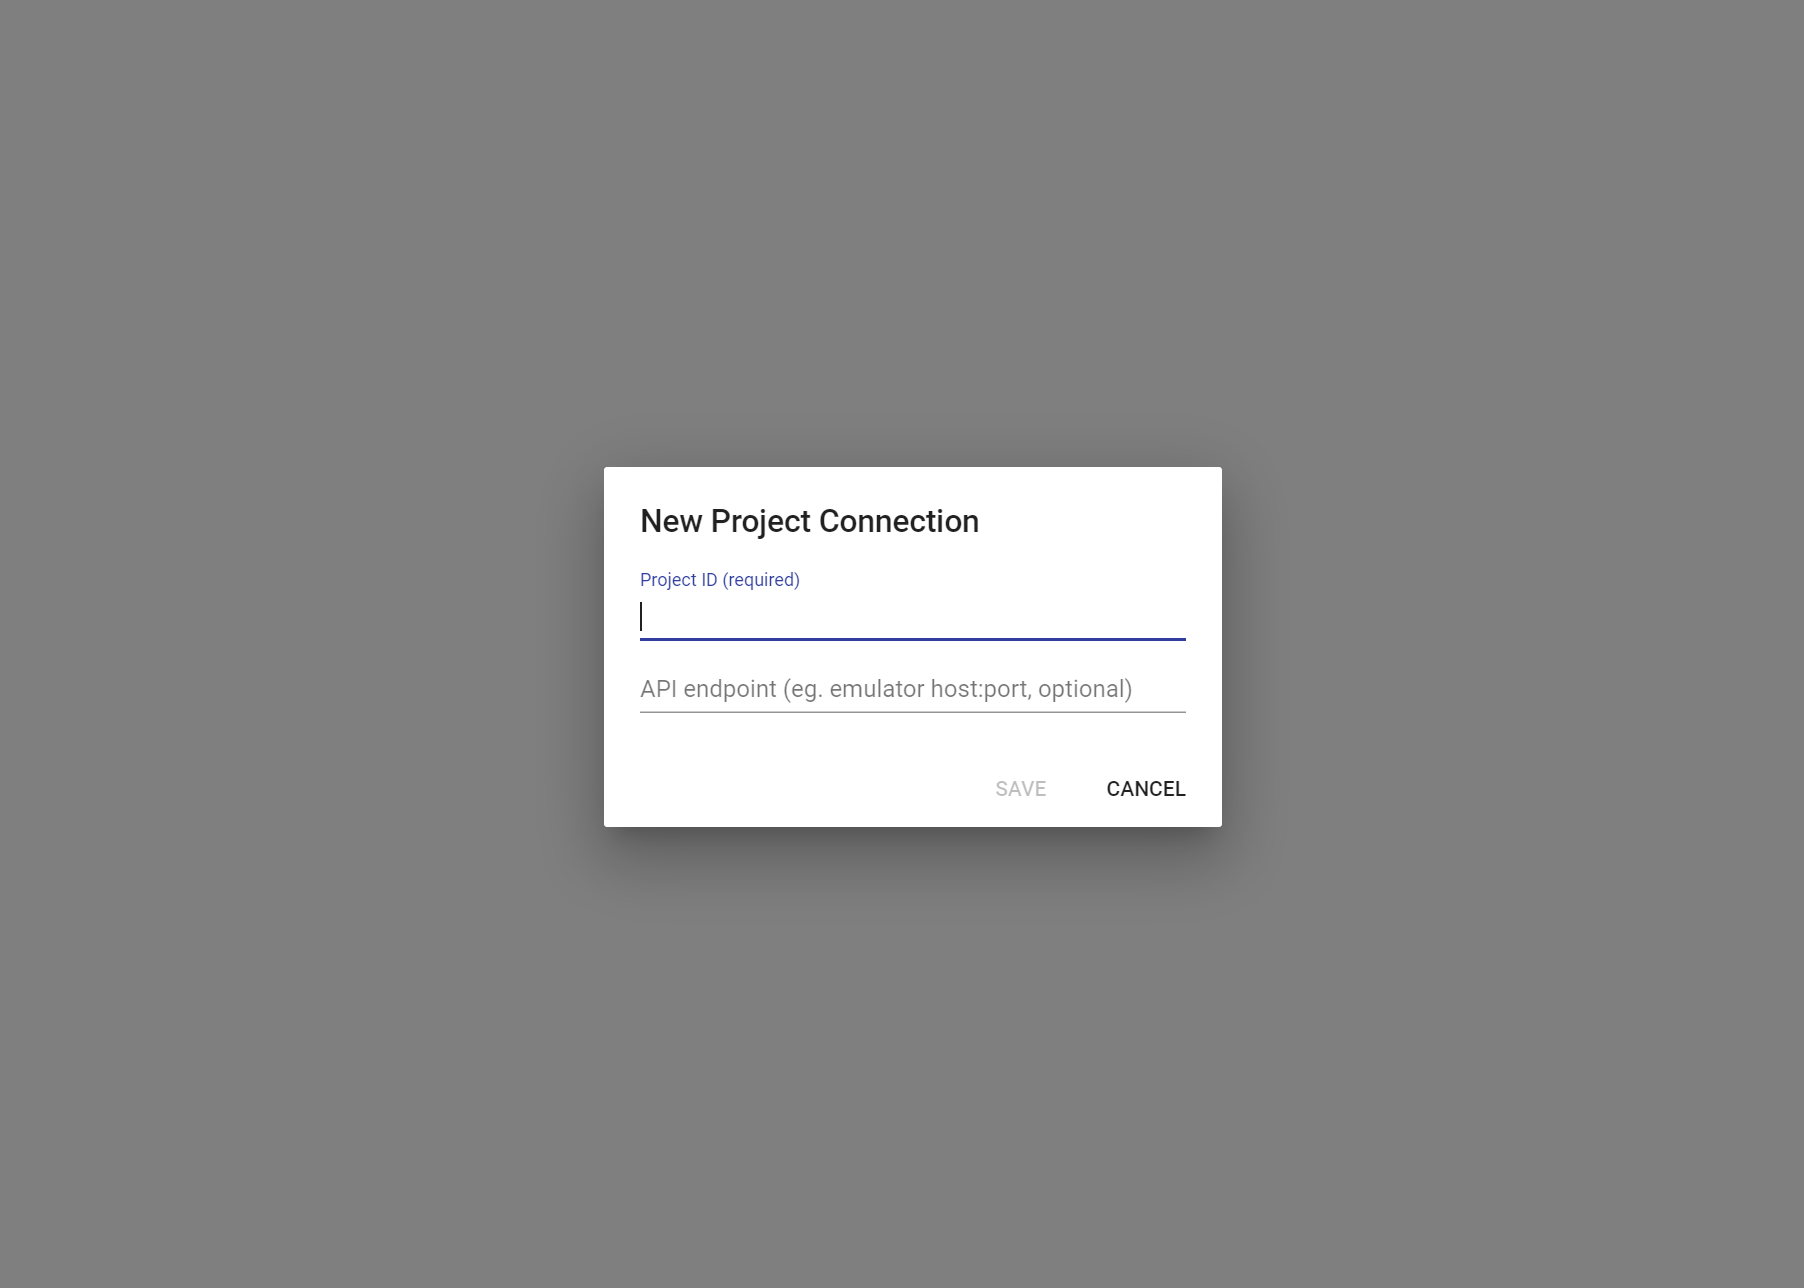
このような画面が表示されると思います。この画面の左上のProjectsをクリックすると、下記のように接続情報の入力画面になります。接続情報には
- Project ID = GCPプロジェクト名
- API endpoint = localhost:8081
を指定してSAVEをクリックします。
接続先を設定すると、起動しているDatastoreのemulatorに接続され、その情報が確認できます。
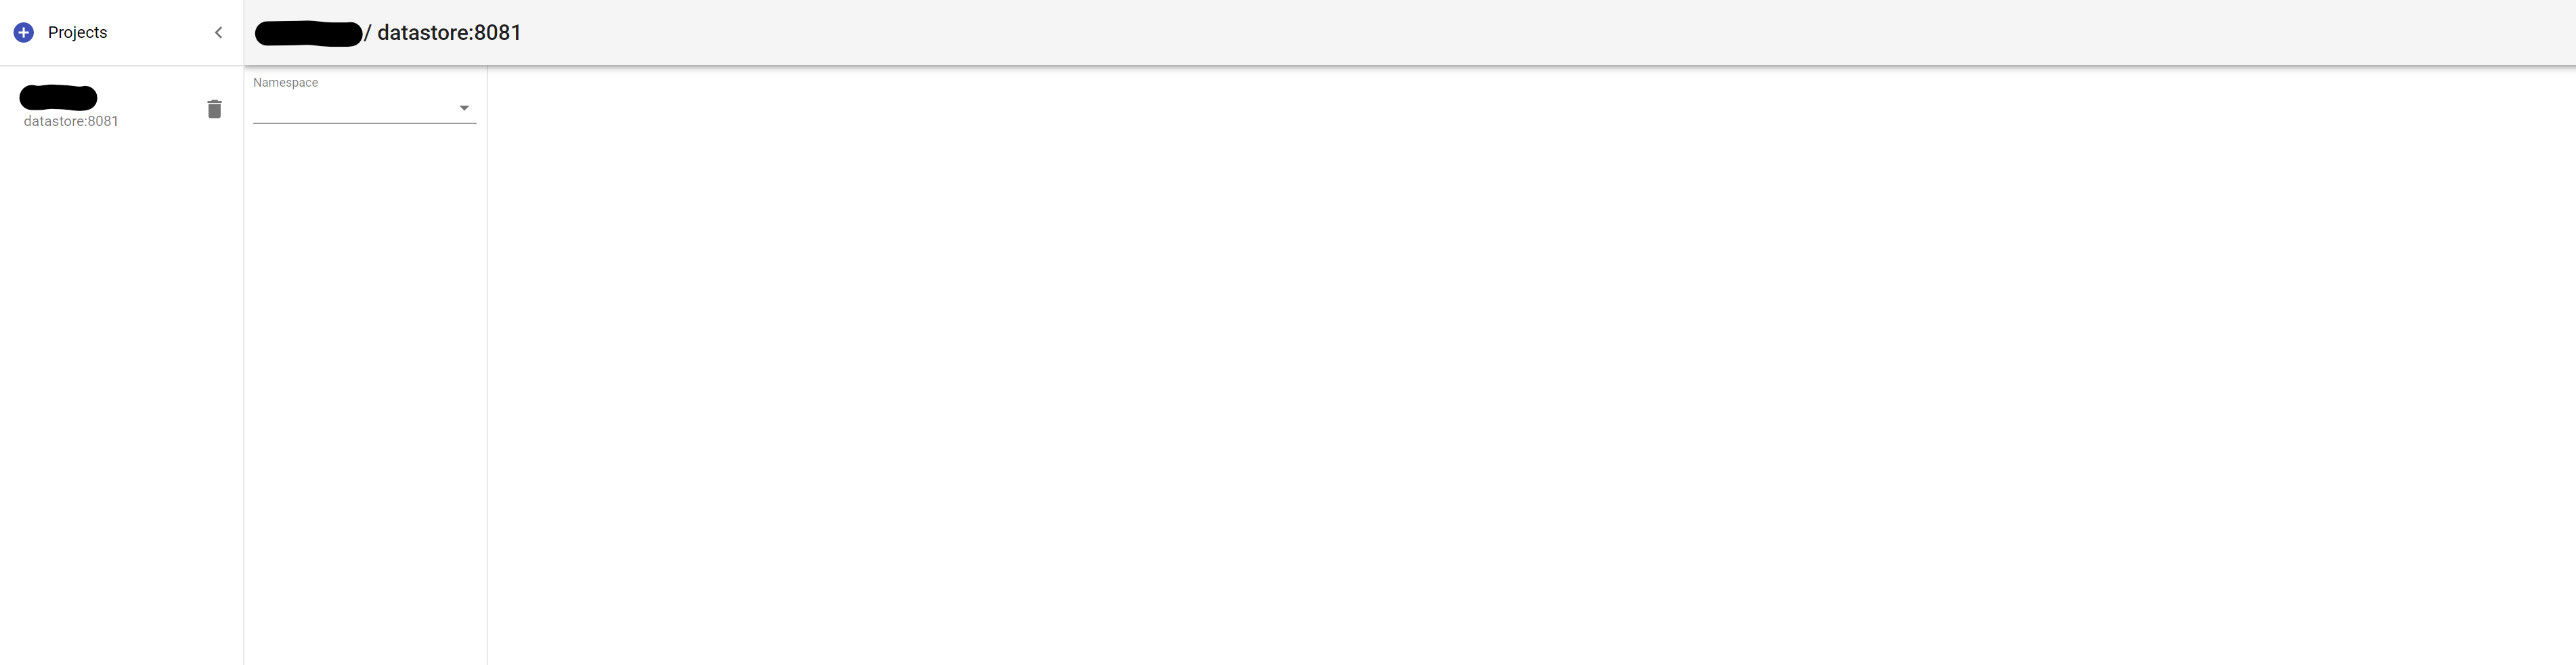
こちらもまだデータが存在しないため、何も表示されていません。
では検証用に作成したアプリケーションを用いてデータを追加していきたいと思います。
アプリケーションの動作検証
先程cloudFunctionsに登録したアプリケーションはDatastoreに1レコード追加する処理と、Authenticationにユーザーを追加する処理となっています。ここでは各々の処理の動作確認を行っていきます。
まずcloudFunctionsのemulatorで動作している関数ですが、こちらはコンテナログを確認することで動作しているURLが確認できます。以下のコマンドでコンテナのログを確認してみましょう。
docker logs emulators

:
:
i  ui: Emulator UI logging to ui-debug.log
i  functions: Watching "/emulator/functions" for Cloud Functions...
✔  functions[us-central1-test1]: http function initialized (http://0.0.0.0:5001/${GCPプロジェクト名}/us-central1/test1).
✔  functions[us-central1-test2]: http function initialized (http://0.0.0.0:5001/${GCPプロジェクト名}/us-central1/test2).

┌─────────────────────────────────────────────────────────────┐
│ ✔  All emulators ready! It is now safe to connect your app. │
│ i  View Emulator UI at http://0.0.0.0:4000                  │
└─────────────────────────────────────────────────────────────┘

┌────────────────┬──────────────┬───────────────────────────────┐
│ Emulator       │ Host:Port    │ View in Emulator UI           │
├────────────────┼──────────────┼───────────────────────────────┤
│ Authentication │ 0.0.0.0:9099 │ http://0.0.0.0:4000/auth      │
├────────────────┼──────────────┼───────────────────────────────┤
│ Functions      │ 0.0.0.0:5001 │ http://0.0.0.0:4000/functions │
└────────────────┴──────────────┴───────────────────────────────┘
  Emulator Hub running at localhost:4400
  Other reserved ports: 4500

Issues? Report them at https://github.com/firebase/firebase-tools/issues and attach the *-debug.log files.
上記のログからcloudFunctionsが待ち受けているURLが確認できました。
それではまず、Datastoreにレコードを追加する処理の検証を行ってみます。
以下のコマンドでコンテナ内のcloudFunctionに対してhttpリクエストを送ります。
docker exec -it emulators curl http://localhost:5001/projectname/us-central1/test1実行結果を確認するために、再度Datastoreの管理画面を確認します。

レコードが追加されていますね。
これでemulator上のcloudFunctionからemulator上のDatastoreにデータが保存されることが確認できました!
次にユーザーを追加する処理の検証も行ってみます。
先程と同様に以下のコマンドでコンテナ内のcloudFunctionに対してhttpリクエストを送ります。
docker exec -it emulators curl http://localhost:5001/projectname/us-central1/test2実行結果を確認するために、再度emulatorの管理画面内のauthを確認します。

こちらもユーザーが追加されていることを確認できました!
これでCloudFunctions、Datastore、Firebase Authenticationsのemulatorでの動作確認ができました。
接続クライアントの設定
ここまでの検証でおこなったのはemulator内で処理を完結させたものとなっており、実際には別のアプリケーションから処理を行うことになると思います。以下ではその際に必要となる設定について記載していきます。
firebaseSDK(v9)でのAuthenticationの設定
authenticationのEmulatorに接続するには、getAuthで取得したインスタンスを第一引数にconnectAuthEmulator関数を呼び出します。第二引数には先ほど構築したauthエミュレータのURLを指定します。
ここではそのURLを環境変数として利用し、環境変数が存在しているときはemulatorに接続し、そうでないときはemulatorに接続しないようにする形で制御しています。
index.ts
import { FirebaseOptions, getApps, getApp, initializeApp } from 'firebase/app';
import { getAuth, connectAuthEmulator } from 'firebase/auth';

const firebaseConfig: FirebaseOptions = {
    apiKey: process.env.VUE_APP_AUTH_API_KEY,
    authDomain: process.env.VUE_APP_AUTH_API_DOMAIN,
}

if( !getApps().length ) {
    initializeApp(firebaseConfig);
    // emulatorの接続URLが環境変数で指定されているときのみ接続を行う。
    if( process.env.VUE_APP_AUTH_EMULATOR !== undefined && process.env.VUE_APP_AUTH_EMULATOR != "" ) {
      const firebase = getApp();
      const auth = getAuth(firebase)
      connectAuthEmulator(auth, process.env.VUE_APP_AUTH_EMULATOR);
    }
}
.env
VUE_APP_AUTH_API_DOMAIN=example.firebaseapp.com
VUE_APP_AUTH_API_KEY=ABCDEF123456
VUE_APP_AUTH_EMULATOR=http://auth.emulator:9099
Datastoreの接続設定
datastoreのemulatorに接続するには、アプリケーションを起動するサーバー内の環境変数を設定するだけで問題ありません。
設定する環境変数は以下で取得できますが、一部編集して設定する必要があります。
docker exec -it emulators gcloud beta emulators datastore env-init --data-dir=/emulator/data取得できる環境変数は以下のようになっています。
export DATASTORE_DATASET=[GCPのプロジェクト名]
export DATASTORE_EMULATOR_HOST=0.0.0.0:8081
export DATASTORE_EMULATOR_HOST_PATH=0.0.0.0:8081/datastore
export DATASTORE_HOST=http://0.0.0.0:8081
export DATASTORE_PROJECT_ID=[GCPのプロジェクト名]この内、0.0.0.0となっているアドレスを外部から接続できるIPアドレスに変更して設定する必要があります。
ここまでの設定を行うことで、外部のアプリケーションがemulatorに接続を行うようになります。実際の本番環境等にデプロイする時には、これらの環境変数を削除することでemulatorを使用せず本来の環境に接続するようになるため、上記以外のソース等の変更は不要です。
ここまでで説明したfirebase local emulator suiteは(https://firebase.google.com/docs/emulator-suite?hl=ja)で、Datastore Emulatorは(https://cloud.google.com/datastore/docs/tools/datastore-emulator?hl=ja)でGoogleにドキュメントが掲載されています。各Emulatorの詳細を確認したいときはこちらを参照してみてください。
所感
GCPに実際に接続して確認、検証を行うというのはそれなりにコストや工数がかかるものですが、今回紹介した手法を用いることで、ローカルで事前に機能を試してみたりテストしてみたりということが気兼ねなく行えます。
GCPのプロジェクト作成はアカウントが必要になりますが無料で行うことができるので、是非お試しいただけたらと思います。